Introduction
Cycles are a key component of the Appraise module. Cycles allow you to assign users to a group and allocate a specific set of standards for that group to be measured against. We typically see Cycles being built around a users' faculty role. For e.g. Teachers, Leaders, Teaching Assistants, and so on.
- Create new cycles for each role in your organisation
- Edit cycle start and end dates, details and set standards
- Add or remove users from cycles
- Create form structures to customise your appraisal procedure
- Schedule forms to promote ongoing feedback and review
Below is an example of the Cycle Manager Overview screen.

Building a Cycle
Building a cycle is a straight-forward process.
A cycle has 3 basic elements:
- Framework / Standards (Terminology is used inter-changeably here)
- People
- Forms

2. Here you need to:
- Name your Cycle
- Select your Framework
- Select your Start + End dates
- Auto-Enroll (This means any users in this cycle will be auto-enrolled into the future variations of this cycle. This is almost always Yes)
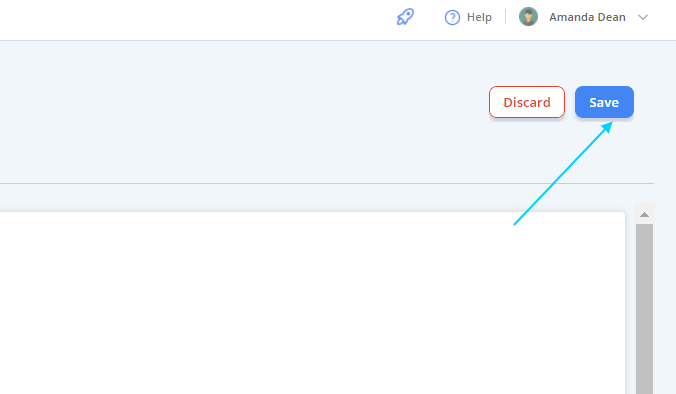
Once complete, select "Save" located at the top right of the window to continue.

People
3. Navigate to the "People" tab at the top of the window.
This screens allows you to add users to the cycle.
Select the "Manage Users" button at the far left of the screen.

4. From this window, select the users you wish to add to the cycle and use the right directional arrow to add.


Submit when finished.
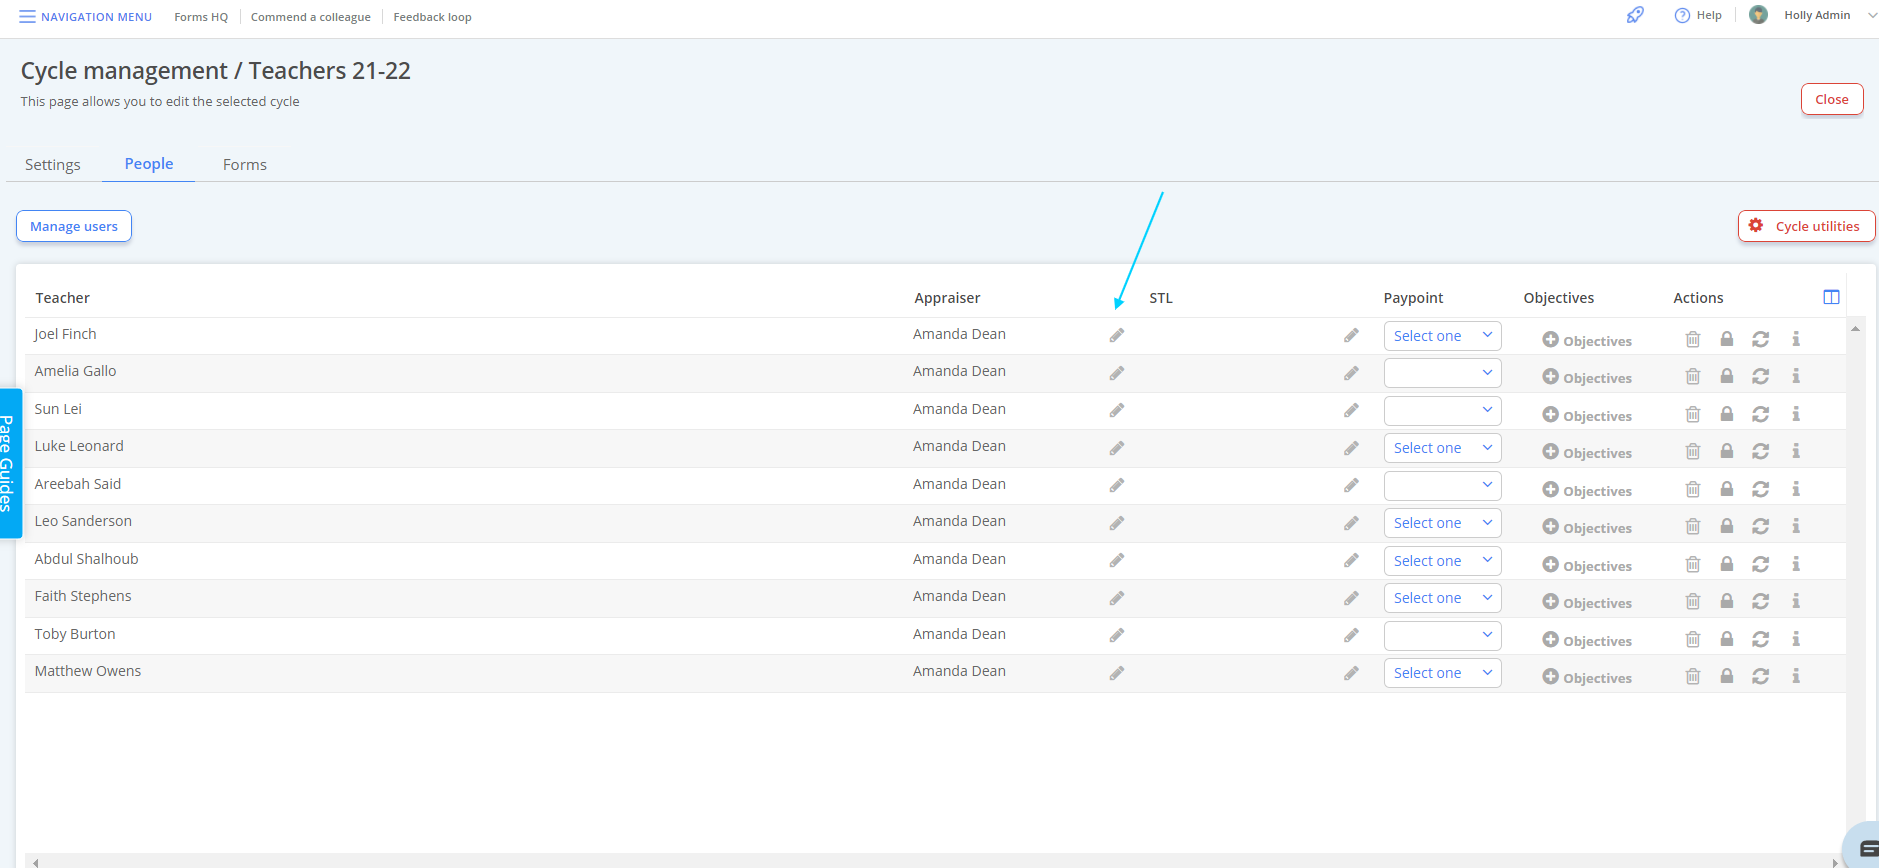
You will then be directed to the screen below.
5. Here you need to assign a users' Appraiser and/ or their senior teacher link. Do this by selecting the Pencil Icon next to each Appraiser field.
Lastly, you need to configure the forms section of the cycle.
Forms
3. Navigate to the "Forms" tab at the top of the window.
Below is an example of a forms set-up. It has:
- Page Label for the cycle (This is the heading that appears on a users record)
- Forms Structure - Yes
- Sign-off Section (This is the authorisation control that means a record has to be approved by both the Appraisee and Appraiser to close) - Yes
- Forms Section
- Sign off Section


There are 2 types of form Structure:
- Push / Pull Cycles
- Ordinary Cycles
Push / Pull Form Cycles
The Push/Pull structure is typically the most common set-up in a cycle with Objective Setting.
Push/pull form structures are an effective way of pushing forward any objectives set for the Future, into the "Current" section for Objectives in the next variant of the cycle.
Push = Any objectives set in the "Future Objectives" section of a closing record are "pushed" into the "Current Objective" section of the next cycle.
Pull = The "Current Objectives" section of the new cycle "pulls" data from the "Future Objectives" section of the closing record to populate the objectives.
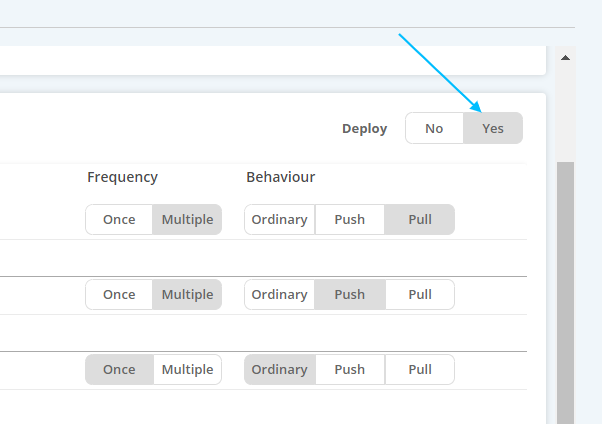
1. To set up push/pull, select "Add Section" located next to the "Forms" header.

2. Create the first section using a Header of your choice.
3. Assign the frequency and the behaviour - in this case we want Multiple (users can enter multiple instances of the form) and "Pull".

You should end up with something like the below.

Once complete, select "Save" at the top right of the screen.
Ordinary Cycles
Ordinary form cycles are stand-alone cycles that don't interact with each other.
1. To set up, select "Add Section", located next to the "Forms" header.

2. Create the first section using a Header of your choice.

In this example the behaviour is set to "Once". The user can raise only one form instance but they can edit multiple times.
Save when complete.
IMPORTANT; It's important to remember to deploy your Forms framework for it to become live in the Appraise Module.
Below is an example of a user enrolled into the cycle.

Editing a Cycle
Navigation Menu / Setup / Simple Setup / Cycle Manager
Cycles can be opened and edited at any time using the same navigation pathway as before - detailed above.
- Create new cycles for each role in your organisation
- Edit cycle start and end dates, details and set standards
- Add or remove users from cycles
- Create form structures to customise your appraisal procedure
- Schedule forms to promote ongoing feedback and review

Future variants can be edited in the same way as Current Cycles.
