The Appraise modules holds all the cycles and records within the organisation, allowing you to keep a live overview of users' progress and goals.
TABLE OF CONTENTS
Introduction
For an Appraiser, the Appraise module also holds all the cycles and records you have access to within the organisation, allowing you to keep a live overview of users' progress and goals.
- Maintain an overview of the cycles you manage
- Add goals and objectives to users
- Create a portfolio of work for users to evidence their achievements
- Explore analytics and create reports to assess performance
- Complete forms that may be available for you and others
- Set up scheduled forms to promote ongoing review and engagement
Your Module Home Page
When you access the module and select a cycle, you will land on the below Appraise Landing Page.

Let's take a closer look...
5. Status Filters - This area allows you to filter a cycle by the users' current status.
List vs Dashboard View
List view is selected as standard and shows the list of all the current cycles within the organisation and their associated records.
1. To switch to Dashboard view, simply toggle the switch located at the top of the page, underneath the Module Header.

Dashboard view looks as below:

Dashboard view offers a more illustrative view of current cycles and user status. This may be your preference if you would like to view cycles as a whole, rather than scroll through a list.
Your Record
As an Appraiser, you can switch between viewing all records (as pictured above) and viewing your own record.
1. Toggle the switch located at the top of the page to view your own record.
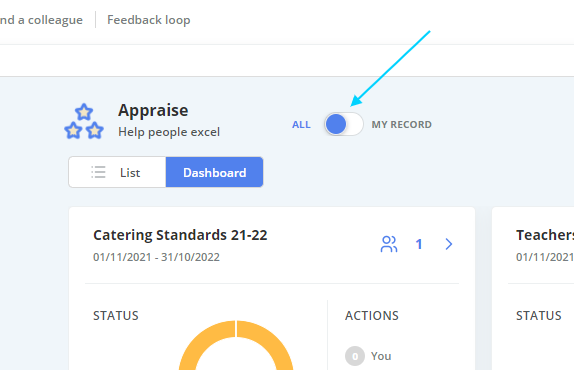
2. You will be re-directed to an overview of your record and your forms/objectives.

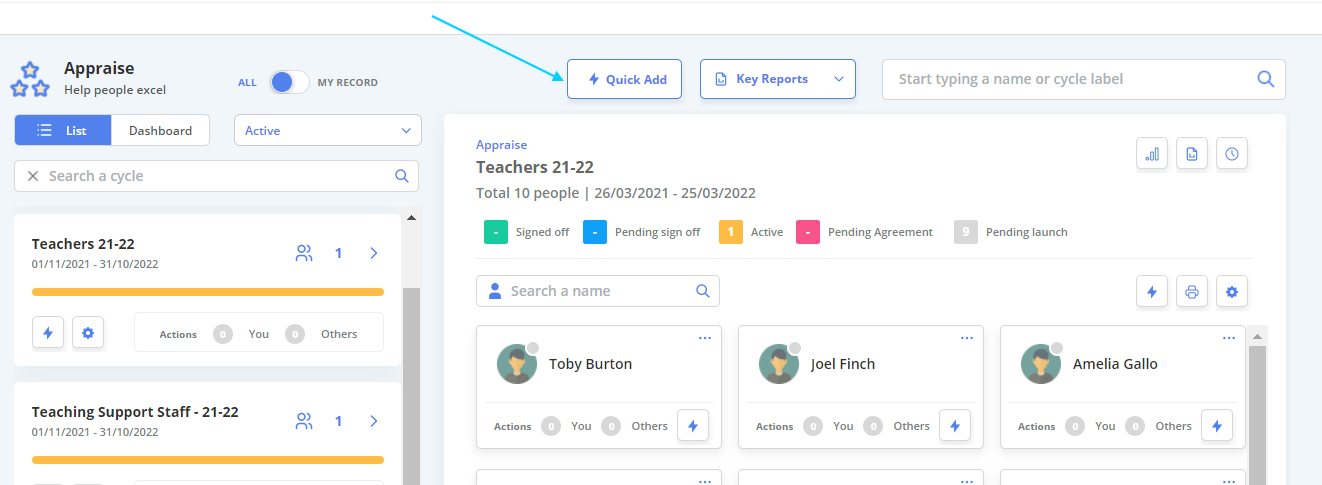
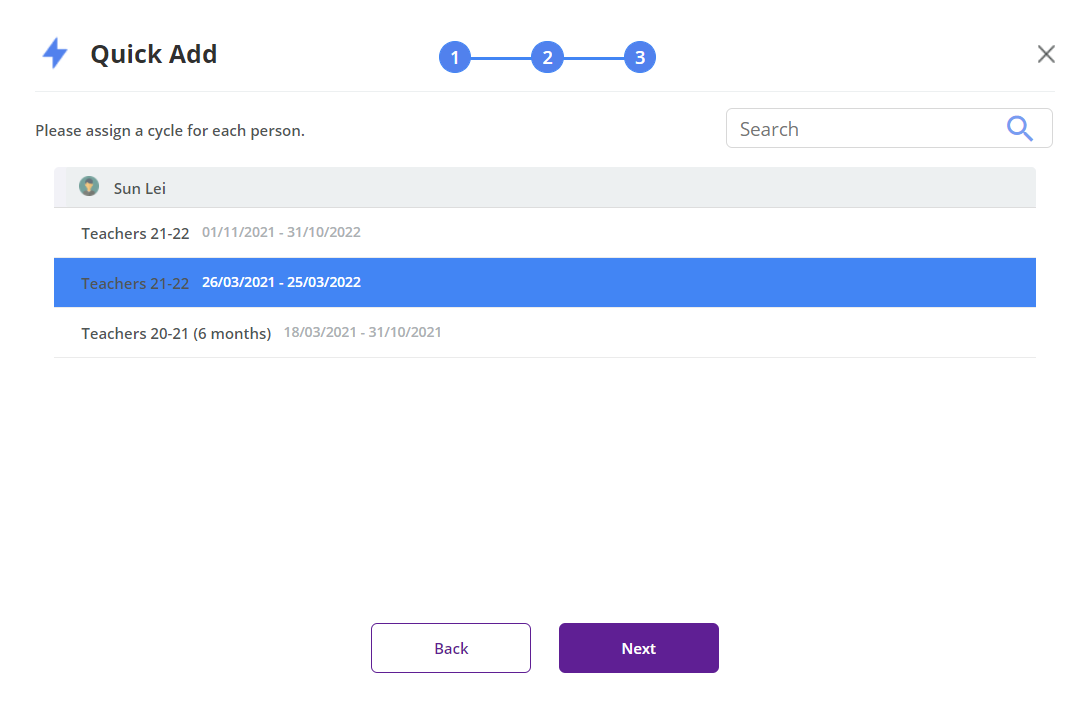
Quick Add
The quick add tool allows you to complete a task for yourself or someone else without having to open a record.
The Quick Add menu looks like this:

2. Select the form/action you would like to use, and select "Next".
3. The wizard will guide you through a series of screens to complete the task.

Status Filter
The status filter allows you to filter your users in a cycle based on their status (Active, Signed Off, Pending Signoff, Pending Agreement, and Pending Launch).
1. To filter users, click on the status you would like to filter by on a cycle page.


Search Functions
- Master search - This searches all records and cycles across the module
- Cycle specific search - This searches records within a particular cycle. (To access this search, select a cycle)

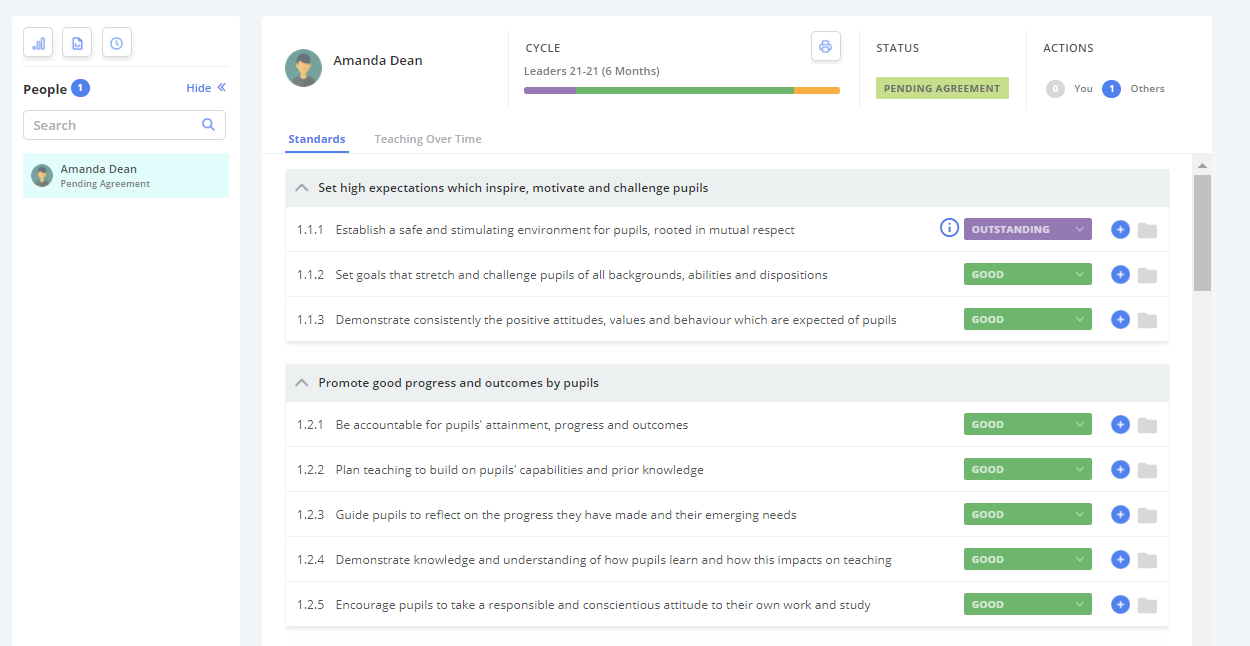
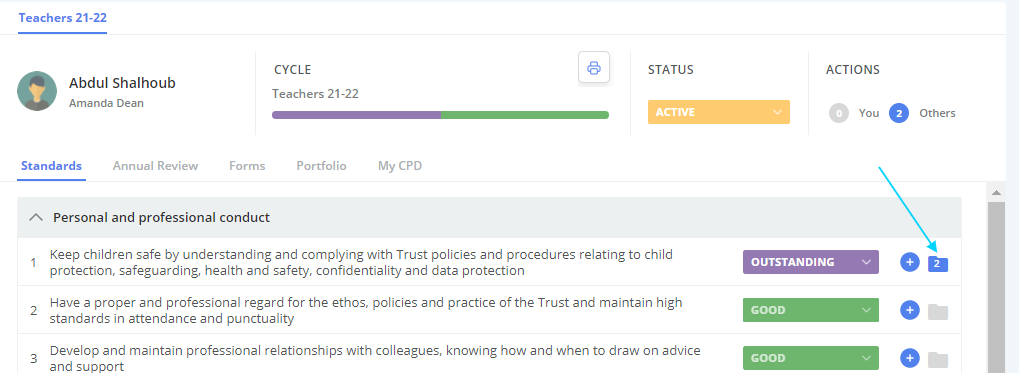
Standards Page
This is the Standards page of a users record, it also acts as the landing page when opening a users record.

Make a Change Request
As an Appraiser, you can make changes to a users standards.
1. To do this, select the drop down arrows to the right of the current grade and select your desired updated value.

2. A pop-up box will appear, which requires you to add supporting notes regarding for why you feel the change is reflective of your performance.
Submit when ready.

3. Once you have made your desired changes, select "Submit" at the bottom of the screen to submit the changes for review by the user.
The user will be prompted by your changes on their next log in via the Action Station.

Respond to a Change Request
As an Appraiser, change requests made by users to their own records are sent to you for approval.
This will appear as an Action in your Action Station when you log in as below.
1. To respond to the change request, select either "Accept" or "Decline".

Add Items against a Standard
Both an Appraiser and an Appraisee can add various items against a standard.
1. To do this, select the small "+" next to the standard you wish to add an item(s) for.
2. Choose the relevant item from the drop down list.

There are a few options to choose from:
- Upload an item (evidence)
- Add a Note
- Add a Development Goal
3. Work through the relevant wizard and select "Submit" when finished.
The number of items related to a standard is shown in the folder icon to the right. This number is a total count.
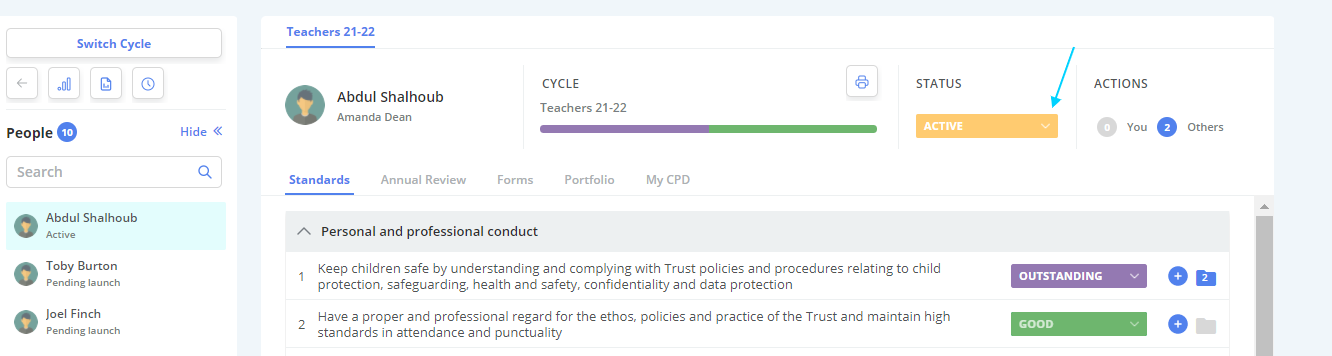
Sign off a Record
An Appraiser is the only school role that can sign off a record in the Appraise module. This is typically done at the end of a cycle, ahead of the next cycles' start date.
A pop up box will appear.
2. If you are with the user who's record you are closing, get them to enter their password.
If you are not with them, select "Sign off" and the sign off is then passed to the user, who is prompted on their next log in.

Close a Record
Navigation Menu / Setup / Simple Setup / Cycle Manager
As an Appraiser, you are also able to force close a record. This is necessary when a user hasn't signed off their record after being promoted on log in.
1. To force close a record, select the relevant cycle that has recently closed from the Cycle Manager screen.
Navigate to recently closed cycles using the filters along the top of the display panel.

2. From the "People" tab, sign off the users' record but selecting the closed padlock to the right of the relevant line.

Confusing Tip to Remember:
A locked padlock means the record is open.
An unlocked padlock means the record is closed.

3. A pop-up box will ask you to confirm. Select "Submit" when happy.
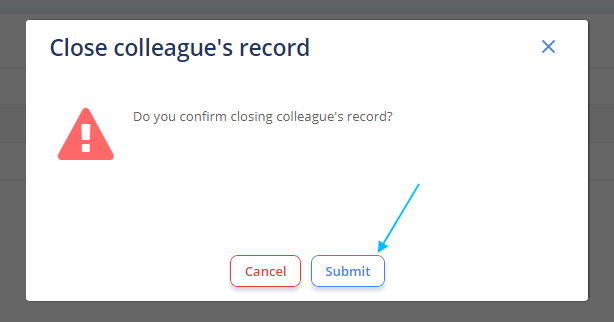
The record is now closed.
Objectives/Cycle Page
This is the page of a users record which is related to any cycles a user is currently enrolled into. Typically this is also a page where their objectives are shown.

Set a New Objective(s)
Typically, Appraisers are the only users that can set objectives.
1. To set a new objective for a user, select the "Add" button to the right of the screen.
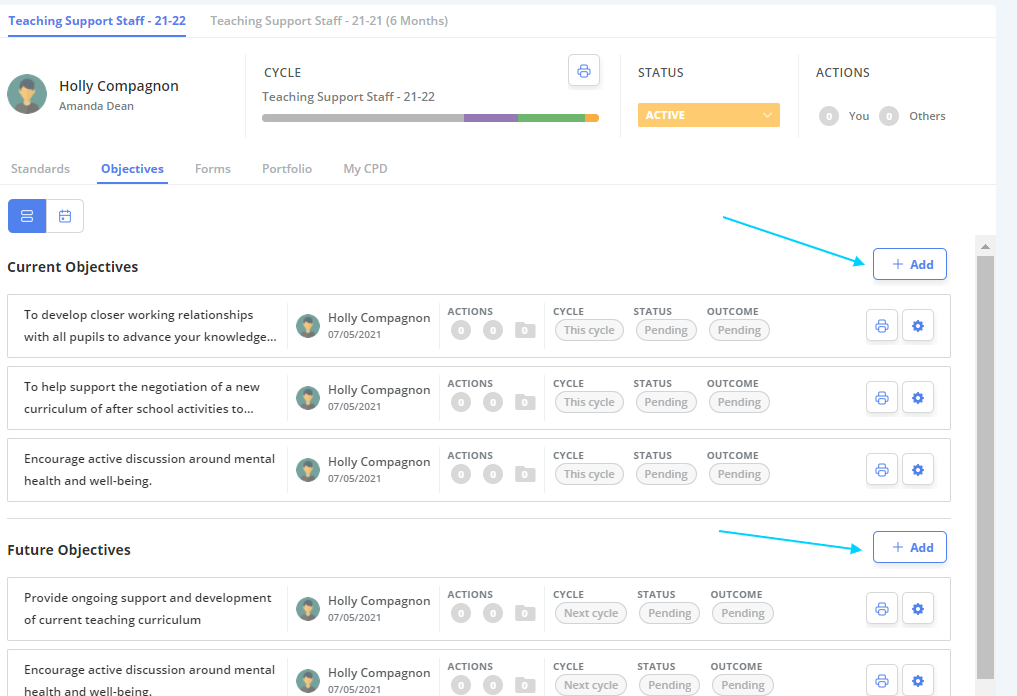
Fill out the form as required, and select "Submit and Close" when done.
The new objective will now be in the users record.

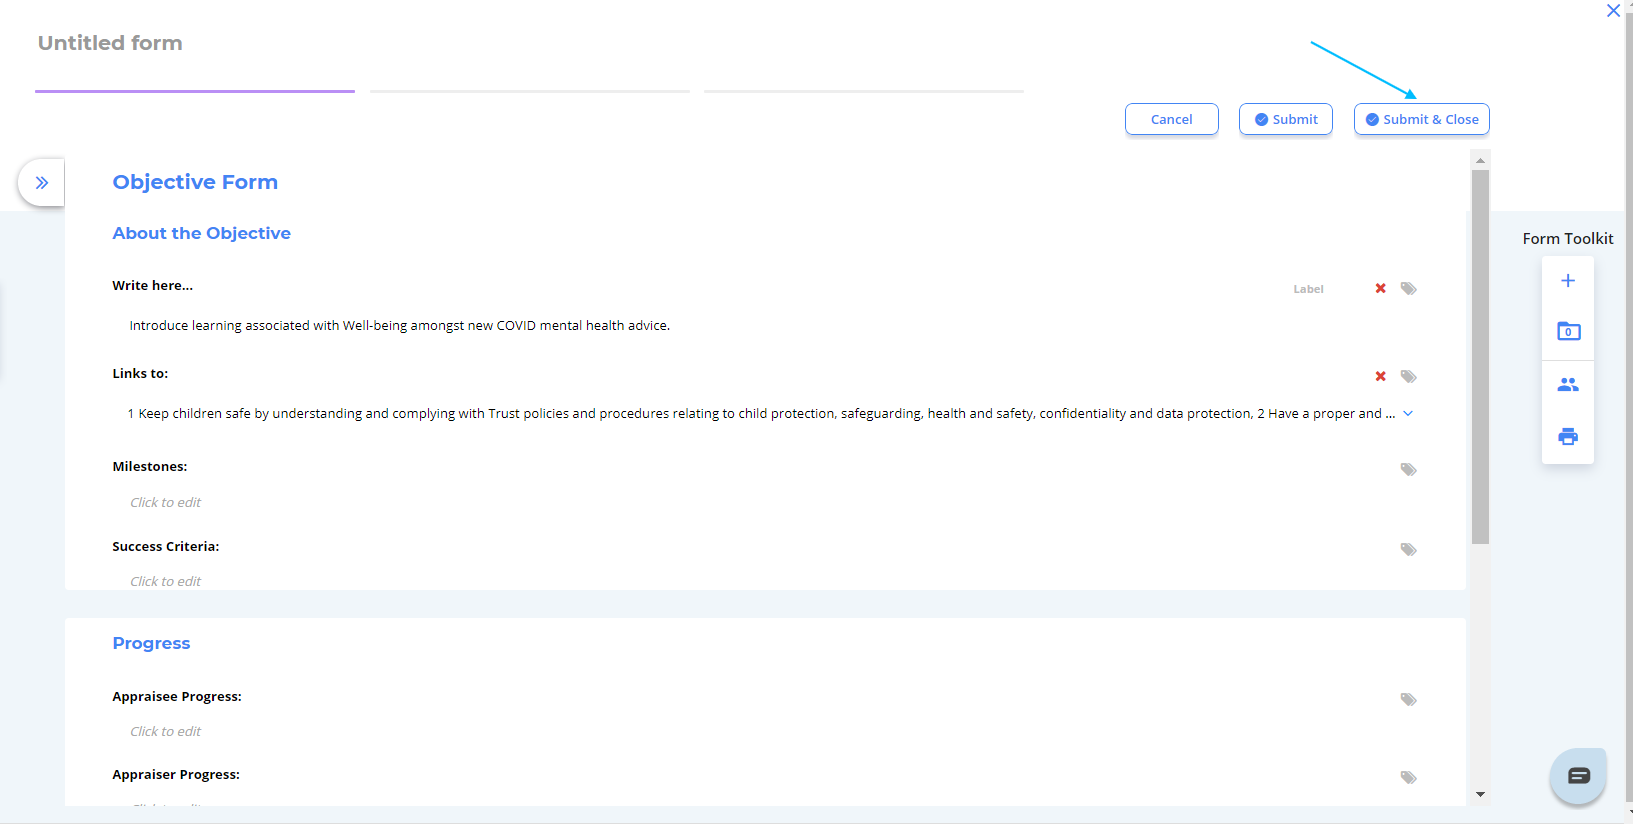
Updating Objectives
Updating objectives is necessary both throughout the cycle and at cycle end.
1. Open the objective you wish to edit by clicking on the relevant objective banner.

2. This opens the objective form where you can add to, edit, or update the objective.
Your form may vary slightly, but each form should have the relevant fields to update progress both throughout and at the end of a cycle.
At cycle end, to evaluate whether the objective has been met, use the buttons provided.

3. "Submit and Close" when finished.

Copying Objectives
You may want to set the same objective for more than one user. Is this case, you can copy objectives across multiple users to save time.
1. Open the objective you wish to copy to other users by clicking on it.

2. To copy the form, select the 2 people icon from the "Form Toolkit", located at the left hand side of the page.

3. A pop-up window will display.
From here, select which fields of the form you wish to copy.

4. Select the users you would like to copy the objective to and select "Copy Form" when finished.

The objectives will now appear in the records of the users you selected.
Archiving Objectives
You may want to archive an objective if it is no longer applicable to that user.
1. In the Objectives tab, select the Cog icon to the right hand side of the objective you wish to archive.
2. Select "Archive" from the drop down menu.
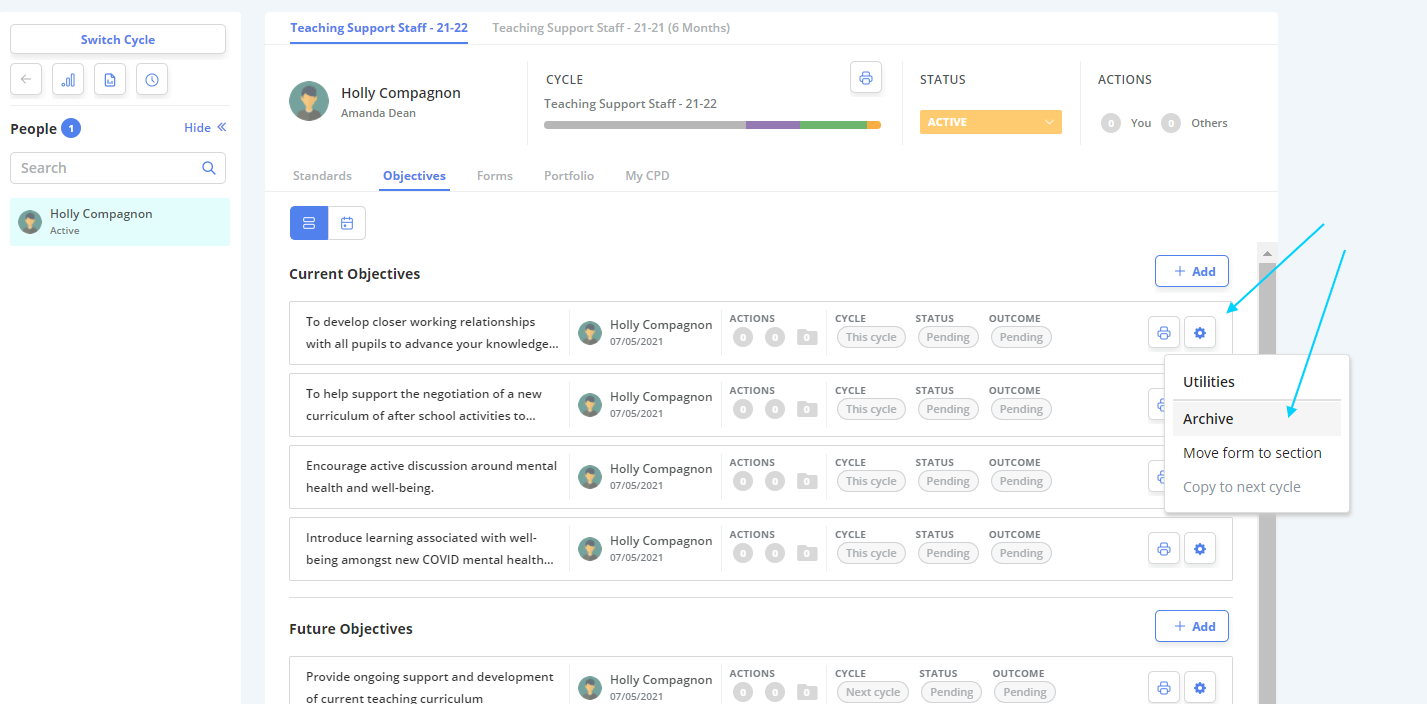
3. A pop-up box will ask you to confirm before proceeding.
Select "Yes, Archive" if happy to proceed.

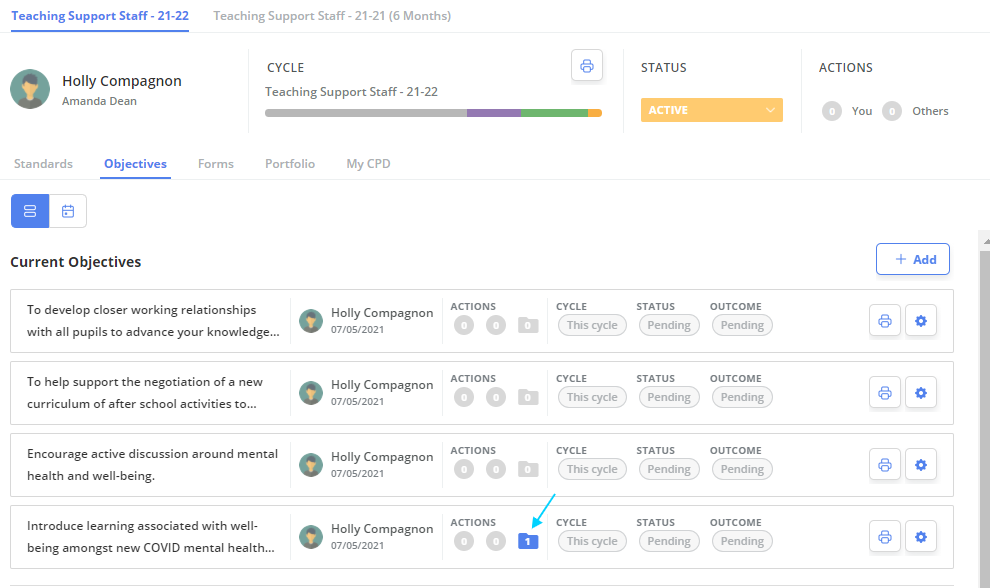
Add Items against an Objective
Both an Appraiser and an Appraisee can add various items against an objective.
1. First, open the objective you wish to add an item of evidence against.

2. Choose the "+" plus icon from the Form Toolkit.

3. Work through the wizard and select "Submit" when finished.
The number of items related to a particular objective is shown in the folder icon to the right of the screen (shown below) and also on the Objectives home page.

Forms Page
This page stores all of a users form entries in one place.

View/Change Users' Form(s)
As an Appraiser you can Add new forms and view/edit a users current forms.
1. To add a new form, select "Add New Form" located at the top right of the page and select the relevant form.

2. To edit or view an existing form, simply click on the form to open it.

Edit as usual.

3. "Submit and close" when editing is complete to update the form.
Add Items against a Form
Both an Appraiser and an Appraisee can add various items against a form.
1. First, open the form you wish to add an item of evidence against.

2. Choose the "+" plus icon from the Form Toolkit, located at the left hand side of the screen.

3. Work through the wizard and select "Submit" when finished.
The number of items related to a particular form is shown in the folder icon to the right of the screen (shown below) and also on the Forms home page.


Portfolio Page
The Portfolio tab is a correlation of all the items/notes/and evidence uploaded against a users record. You can view them all in one place here.
